Homemade jam

Jam is a sweet staple in many households but few people actually make their own! I certainly didn’t for the longest time, thinking the lovely flavor was probably difficult to achieve. Or with my luck the jars would explode. I also had that picture of my grandma pouring wax on the jam in my head, wide orange rubber bands, and whatnot…

But surprise, surprise, in modern reality, making jam is actually quite easy. And once you successfully tried it, you realize that there is a world of flavors out there to experiment with. After that, who would want to go back to the store-bought stuff?!
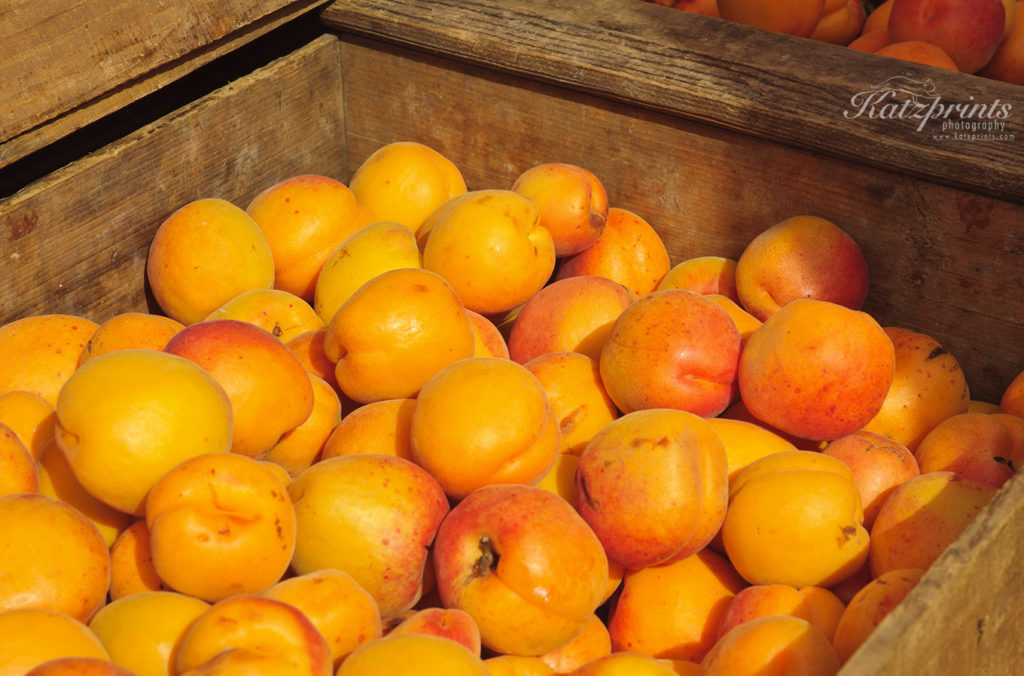
Apricots at local Farmer’s market

There are just a few things to keep in mind when making jams:

-Flavorful fruit makes flavorful jam, so if you can, go with ripe seasonal selections!
-Because you are not adding a boatload of preservatives, you need to work cleanly.
-Have an oven mitt, a towel, and tongs ready because you are dealing with boiling water, boiling jam, and hot jars!

Sterilize the jars

If you are making jam for immediate use, you do not need to go through this step. But if you plan to enjoy your jam collection for a long time (or share with friends – hint, hint!), sterilizing the jars and equipment is important. This is how I do it:

  1. In a clean pot, bring water to boil.
  2. Select jars and lids and immerse them in the boiling water for a few minutes. Don’t overcrowd the pot; it is better if the items do not touch.
  3. Remove from pot with a jar lifter or tongs with gripping ends.
  4. In the same way, sterilize the ladle and funnel you plan to use.
  5. Put all on a clean towel to dry.

Prepare the fruit

First off, make sure you start with enough fruit! Especially if you have very ripe or cosmetically challenged fruit or fruits with heavy pits, the net weight will be considerably lower than the starting weight!

Whatever fruit you use, make sure to discard any moldy or heavily bruised bits.

Further fruit preparation depends on the variety of fruit. Here are some starting points:
-Blueberries just need a quick wash.
-Wash non-organic strawberries really well. Strawberries belong to the fruits most likely to be contaminated with pesticide residues.
-If you do not like the seeds in fruits like blackberries, press them through a sieve.
-Cherries need to be pitted but not peeled.
-Peaches, nectarines, and apricots need to be both pitted and peeled. The best peeling method depends on the level of firmness/ripeness of your fruits. If very firm, just use a vegetable peeler. Another method is to boil the fruits a few seconds and then immediately immerse them in ice water. In very ripe fruits, the peel usually comes off easily with a gentle rub.

Yellow peaches at local Farmer’s market

Weigh the fruit after peeling and pitting to make sure you have the exact quantity needed (in my case that is one kilogram, or about two pounds).

I use a stick blender to puree everything to the desired texture because that’s super quick and easy. However, you can also chop the fruits with a knife and mash them.

Pectin

The most important thing to achieve when making jam is the jelling of the fruit. That can be reached in two basic ways: natural pectin release and long cooking and reduction (this is what we do for our apple butter – it easily takes 10 hours in the oven), or by using a pectin product.

I love, love, love jams that are not too sweet and that is why my personal preference is to use a German product that allows me to cut back on sugar considerably. It is called Gelfix Extra 2:1 (indicating 2 parts of fruit to 1 part of sugar) by Dr. Oetker. If you like your jam even fruitier, they also make Gelfix Super 3:1! In the Bay Area, it is available in German stores like Gourmet Haus Staudt. However, you can also order the product online. If you don’t have access to Gelfix or if you like your jam sweeter, use a classic pectin product from the grocery aisle. Typically, they work for a 1:1 ratio of fruit and sugar. No matter which product you use, the actual jam-making steps are quite similar.

Make the jam

  1. Mix sugar and the pectin product in the ratio required by the product.
  2. Add it to the prepared fruit puree.
  3. Bring to a boil and let boil as indicated (I boil mine 4 minutes).
  4. Constantly stir as the mixture boils.
  5. If the mixture produces a lot of foam, spoon it off (you can eat it but it’s not good to have it in the jar).
  6. After the designated boiling time, you should feel the jam texture changing. Turn off the heat, and ladle the jam into the prepared jars (careful, hot!)
  7. Close the jars immediately making sure the lid fits perfectly.
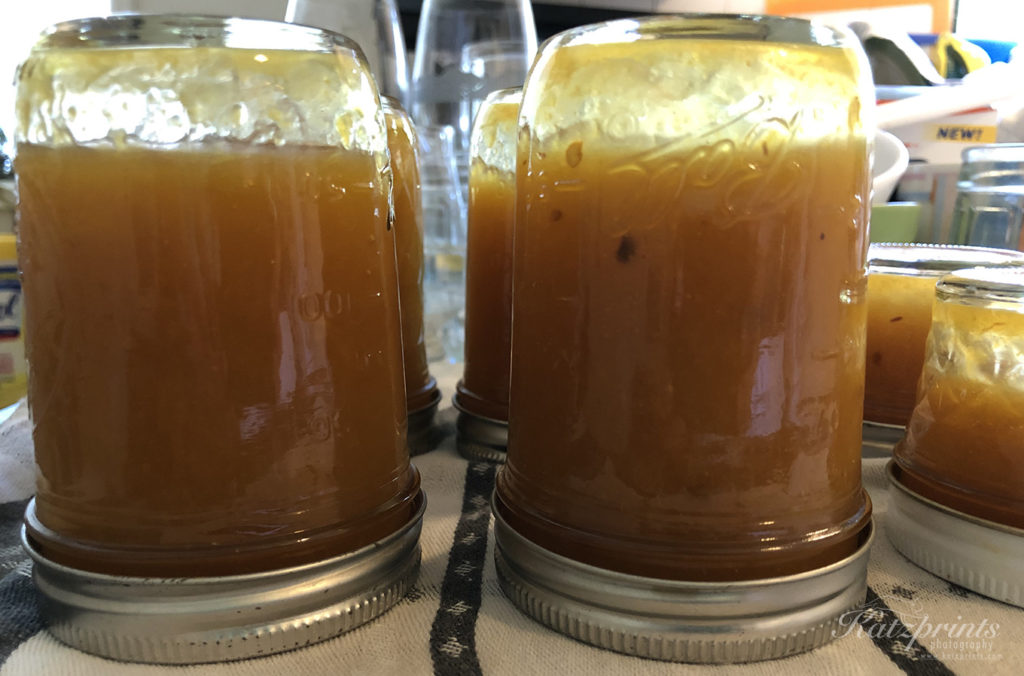
  8. Place the jars upside down on a clean towel for 5 minutes. This is also when you will notice if you have a bad lid…
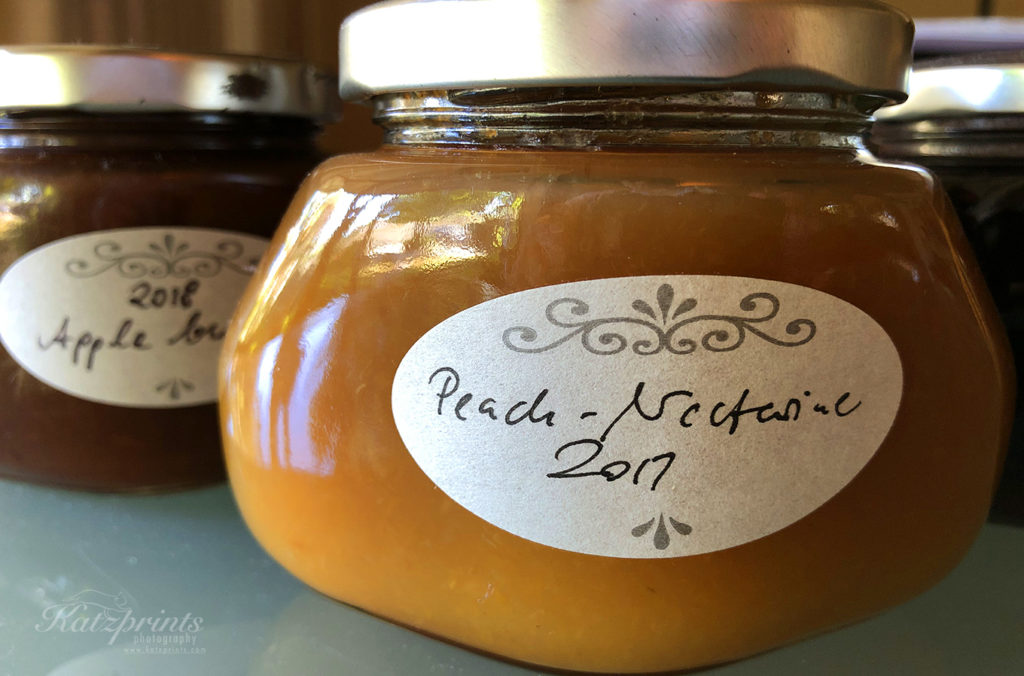
  9. Make labels.
  10. Enjoy!
Summer in a jar

After you have made jam once, it gets faster every time. And think about the next flavors you might like to try. Maybe add alcohol? (Pear and cognac is delicious!) Or experiment with herbs or spices. (I just made peach-mango jam with chili flakes…) Oh, and go for it, mix fruits! There are so many choices!

And here is a trick I learned from my mom: you can prepare the fruit puree in summer and freeze it! Then if you run low on jam, grab that bag of delicious summer-sweet peaches, and make a new batch in the midst of winter. How cool is that?!

Happy jam-making!

DIY hummingbird nectar

We are wrapping up week two of shelter-in-place due to COVID-19, and it just occurred to me that I owe you a blog post! Yes, I do, and what better moment than now?! I just made some hummingbird feed and thought I would share the recipe with you, because, you know, you may have time on your hands too!

But let’s start with a quick flashback.

One of the best discoveries associated with my move from Germany to California was … we have hummingbirds! As a child I always pictured these flying gems on lush tropical islands rather than in my Silicon Valley backyard. But there they were and I fell in love with them in a heartbeat!

I have always had feeders to attract hummingbirds, but over time, I also started to replace the flowers in my backyard with those attracting hummingbirds, butterflies, and bees. That means there are ample food sources available for my flying wildlife now. However, complementing those sources with additional nectar, above all when bloom is low, is a good idea.

Anna’s hummingbird showing some of the iridescent gorget feathers

When I started feeding hummingbirds, I used to buy the red nectar mix available in many stores. Now I know that the red dye in that stuff is extremely unhealthy for the birds and can even kill them 🙁 Thankfully, it is SUPER easy to make your own.

Recipe for hummingbird nectar

All you need is sugar and water and mix in the following ratio:

-1 part refined white sugar
-4 parts of water
(for example: 1/2 cup sugar and 2 cups water)

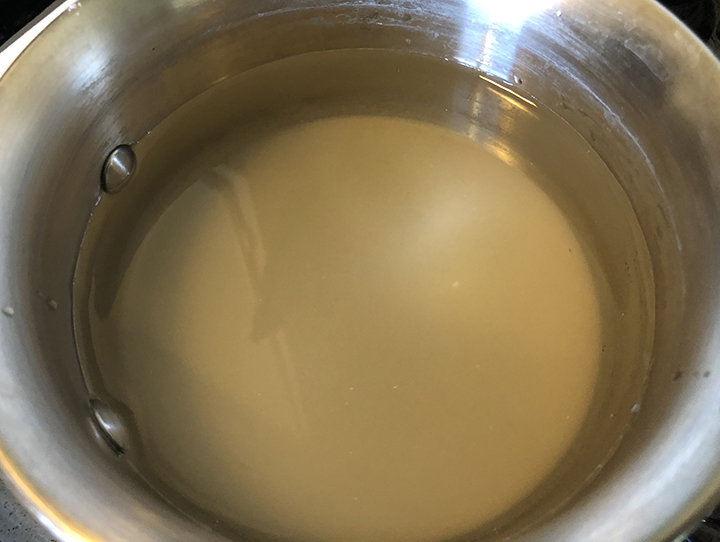
You can add the sugar to boiling water or add it to cold water and bring to boil. It does not matter, as long as the sugar is well dissolved when done. Then let the nectar cool down before filling the feeder.

Please do NOT use anything else but white refined sugar even though it might seem counter-intuitive! The Audubon Society explains that the iron levels in raw sugars are too high and that honey can promote fungal growth; both can be harmful to the birds.

Hummingbird feed (store-bought or home-made) does not last for a long time before fermenting, above all in summer. Therefore, only make as much nectar as your birds consume in a week or so. Also, don’t just refill an empty feeder, always clean it thoroughly first. If there is black stuff coating the inside of the glass, you may need bleach.

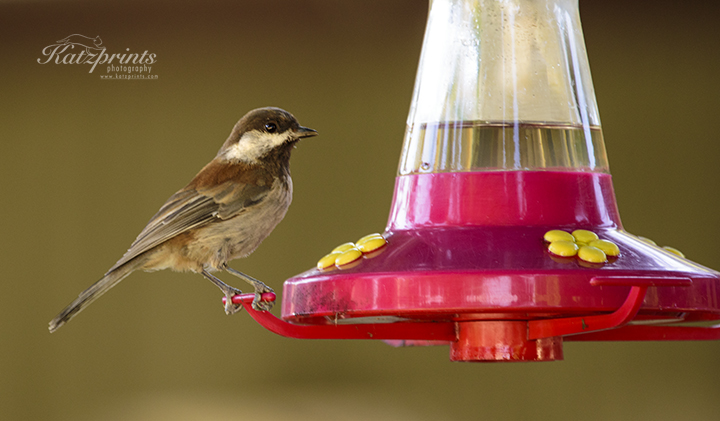
By the way, hummingbirds are not necessarily the only birds visiting a feeder. We have a few sweet-toothed chickadees who often have a sip before heading for the sunflower seeds, and orioles love the sweet stuff as well!

Chestnut-backed chickadee at the hummingbird feeder

What else can you do to attract hummingbirds?

Hummingbirds love, love water features! In summer, ours love to take a shower in our fountain. You also see them hanging out at bubbling pots and sometimes even zipping through lawn sprinklers.

Anna’s hummingbird enjoying the backyard fountain

Our most frequent garden visitors here are Anna’s hummingbirds, but every once in a while a very territorial Rufous or Allen’s hummingbird stops by as well.

Did you know?

It is not unusual for me to get buzzed by a hummer when I am out in THEIR territory. But I don’t mind because I did hear once, that in Native American folklore this hovering in front of your face translates to a blessing. I am not sure if it’s true but I sure like to think so. What I do know is that hummingbirds have always played an important role in the life of tribes. They were and are used in crests and on totems, portrayed as healers or fire-bringers, or considered a sign of luck.

One of the highest mountains in the Bay Area is Mount Umunhum, a sacred mountain to many tribes. While the huge square radar building on its top reminds us of cold war times, the name actually means something much more peaceful: resting place of the hummingbirds (in the Ohlone language).

Beautiful Big Sur (Point Sur to Limekiln State Park)

In my last post, we explored beautiful Highway 1 from Point Lobos to Point Sur. Let’s continue our travel south!

Little Sur River

Andrew Molera State Park

After crossing the Little Sur River and passing the Point Sur Lighthouse and Naval Facility, we reach Andrew Molera State Park, a less developed park with great hiking trails and beachcombing opportunities. A seasonal pedestrian bridge allows visitors to cross the Big Sur River. Check the website for more info. Andrew Molera also hosts the Ventana Wildlife Society’s Discovery Center, where you can learn all about the successful reintroduction of the stunning California condor.

Pfeiffer Big Sur State Park

Our next stop, after passing an area brimming with campgrounds and cabins along the Big Sur River, is Big Sur’s most popular park and camping destination, Pfeiffer Big Sur State Park. Hike under the redwoods, take a summer dip in the river, or have a coffee or icecream in front of the fireplace of the Big Sur Lodge (accessible without entrance fee).

Nepenthe

If you prefer ocean views over rustic charm, drive on to famous Nepenthe restaurant, which sits high on a cliff and has great views from inside and outside seats. This is also a great stop to purchase locally crafted gifts like Big Sur jade jewelry, books, and photography. The parking lot can get very crowded on summer weekends!

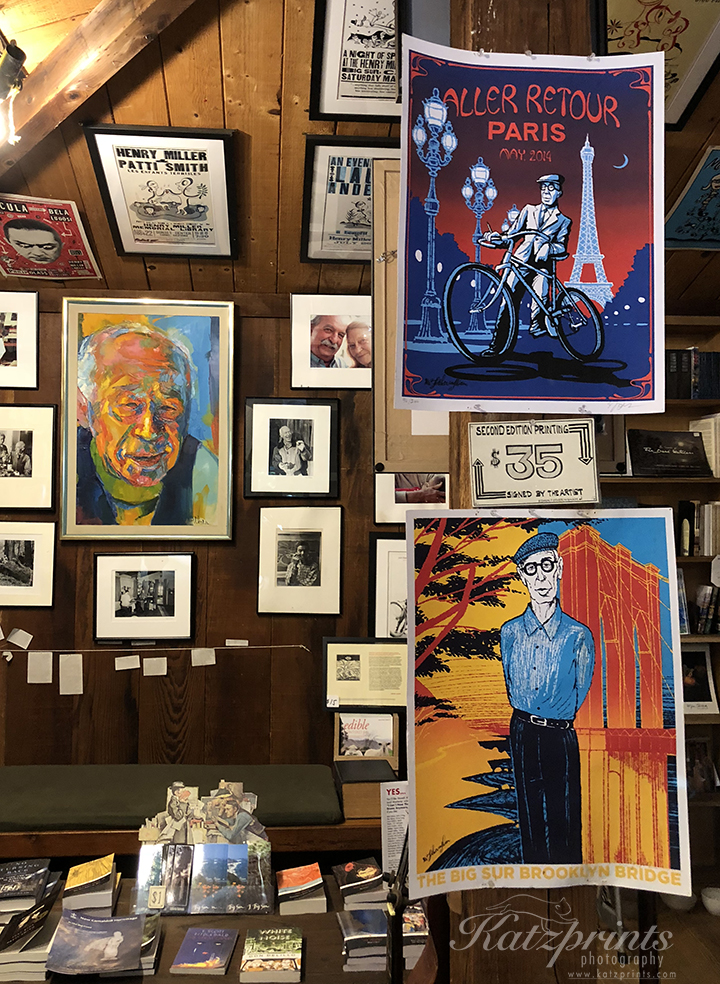
Soon after Nepenthe is another interesting stop: the Henry Miller Memorial Library, both an eclectic bookstore and event center.

Henry Miller Memorial Library

California condors

Driving southward, we are now entering condor country. Look out for these awesome vultures with a wingspan of up to 10 ft. soaring high above the mountains or sitting on cliffs on the side of the road. How do you know it is a condor and not a turkey vulture? The upper part of the condor wings around the head is white, the bottom part is black. The pattern is the opposite for turkey vultures. In addition, most of the condors carry radio trackers and numbers for identification. (I will write in more detail about the condors in a future post.)

Out of the fog, two condors appeared

Julia Pfeiffer Burns State Park

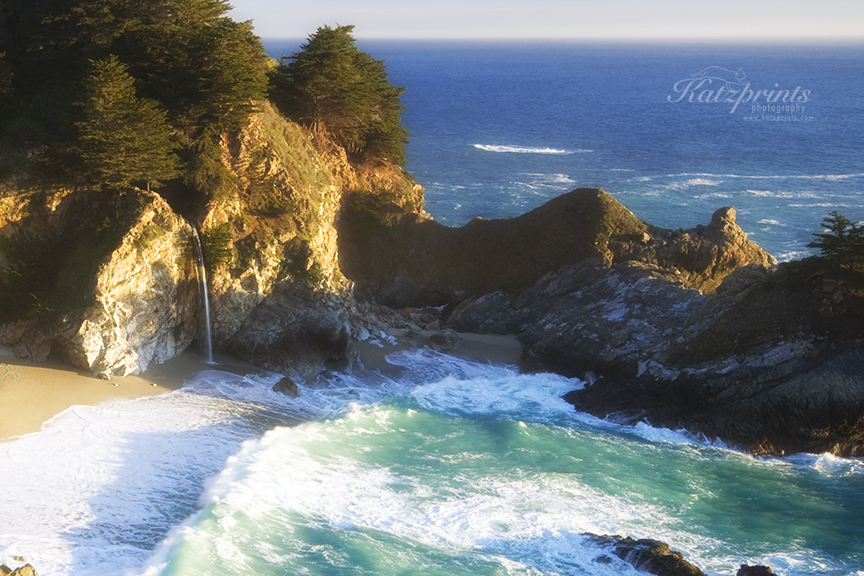
As you drive through the awe-inspiring landscape that is Big Sur, you will see little pullouts here and there with a couple cars parked. Most of these are near trailheads, but no area is more crowded on weekends during the tourist season than that for McWay Falls in Julia Pfeiffer Burns State Park. This incredible 80-foot fall is one of just two in California that empty directly onto a beach. The beach is not accessible but the view from the easily-walked Overlook Trail is well worth it!

Afternoon light at McWay Falls

Limekiln State Park

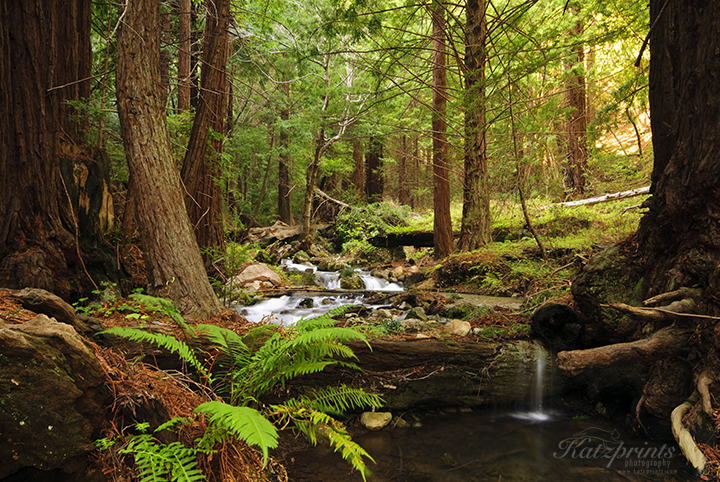
Compared to this busy park, Limekiln State Park is usually calm and peaceful, even though this little park has much to offer: walk under towering redwoods with the burbling sound of Limekiln Creek in your ears, check out the historic kilns, hike to the cascading Limekiln Falls, or enjoy the rocky beach. What’s not to like?!

Limekiln Creek

We have now traveled approximately 55 miles from Carmel, but who is counting?! The third and final part of this post will soon take us all the way to San Simeon and Cambria.

Beautiful Big Sur (Point Lobos to Point Sur)

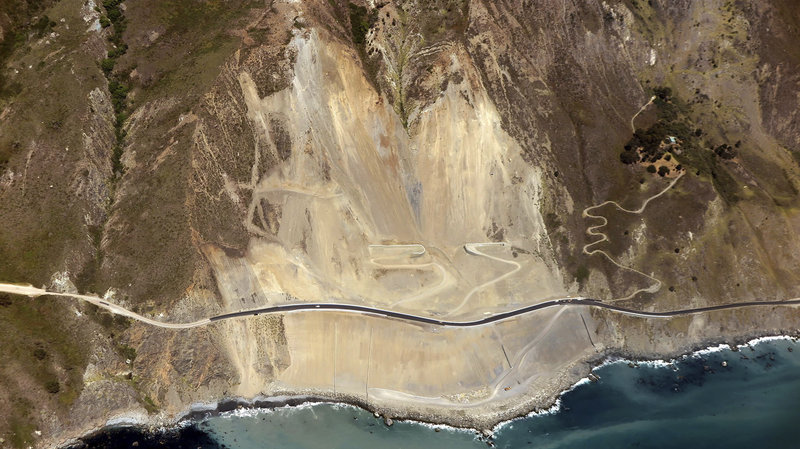
One of my favorite areas to visit in California is Big Sur, an area that stretches roughly from Carmel to San Simeon and inland into the sparsely populated Santa Lucia Range. It is accessible by famous Highway 1, which was completed in 1937 and is considered by many one of the most scenic drives in the US. In some places, the winding two-lane road is close to the water’s edge and offers easy access to parks and beaches; in others, it precariously hugs the coastal cliffs high above the sea, making it an exhilarating drive with sweeping vistas. When it is open, that is… During the El Niño storms of 1998, the road suffered considerable damage in many places and was closed for months. In 2008, the Basin Complex fire, which raged in Big Sur, forced a closure of the highway for several weeks. In 2011, more unfortunate news arrived from the California Department of Transportation: a 40-foot section of Highway 1 crumbled into the ocean just north of Big Sur after a period of strong rain. In 2017, after heavy rains, Pfeiffer bridge got damaged by a collapsing hillside. And just a few months later, the Mud Creek slide saw 5 million cubic yards of dirt and rocks sliding down the hillside in the largest recorded landslide along the Big Sur Coast, altering the coastline forever and leaving a long stretch of Big Sur and its communities inaccessible.

Mud Creek slide, photo AP via Caltrans

As I write this blog, the beautiful highway is open and ready for your discovery. One caveat though: there is no cellphone coverage along some stretches of Big Sur, and services are scarce. So whether you are just driving through, come for the art galleries or plan a longer camping or cabin trip, some old-fashioned preparation ahead is recommended.

In that context, please note that this article does not claim to be “the complete guide to Big Sur”, it rather intends to give those who have never traveled there a first taste of “the big south”. There is more to see than I can cover on these pages and Big Sur literature in print or online is better suited to help you prepare your visit in depth.

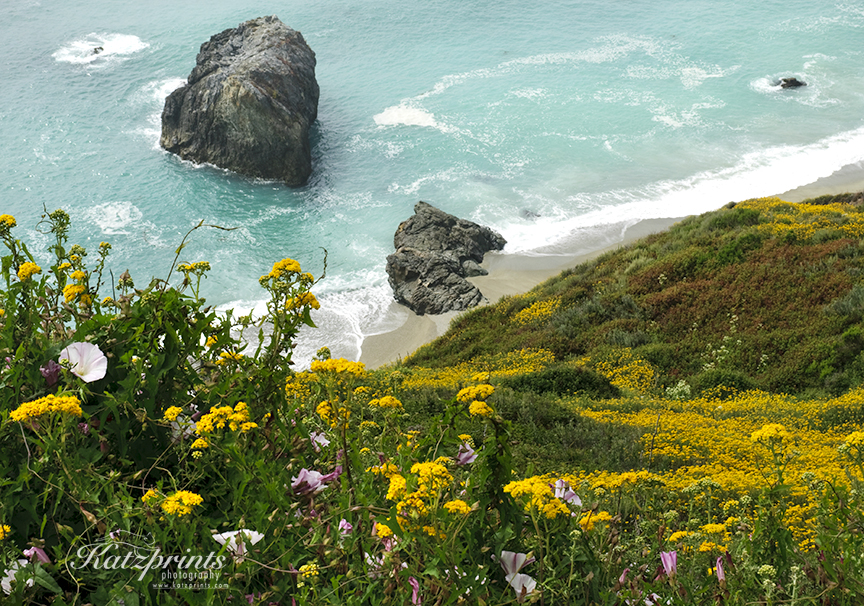
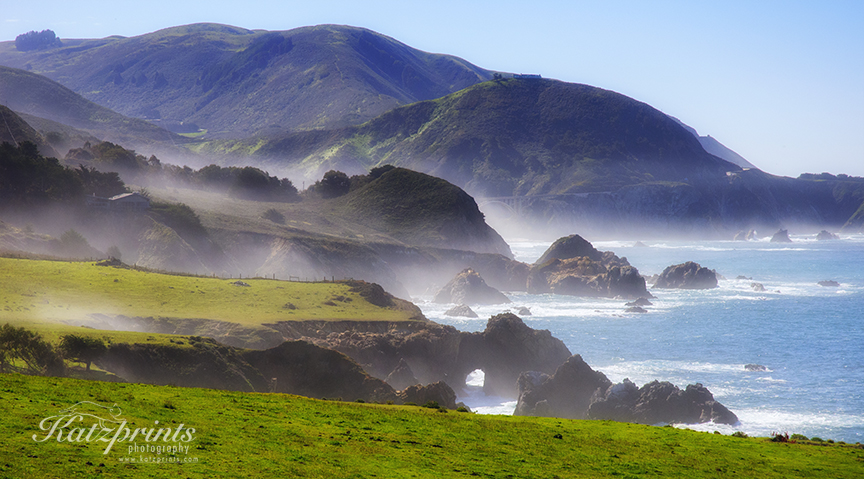
Big Sur coast in spring

Tip: The California State Park website (www.parks.ca.gov) is a good starting point for your trip preparations. Choosing “Central Coast” as a region brings up a linked map from which information for every park shown can easily be accessed. Lots of useful information can also be found on the website of the Big Sur Chamber of Commerce (www.bigsurcalifornia.org).

Point Lobos

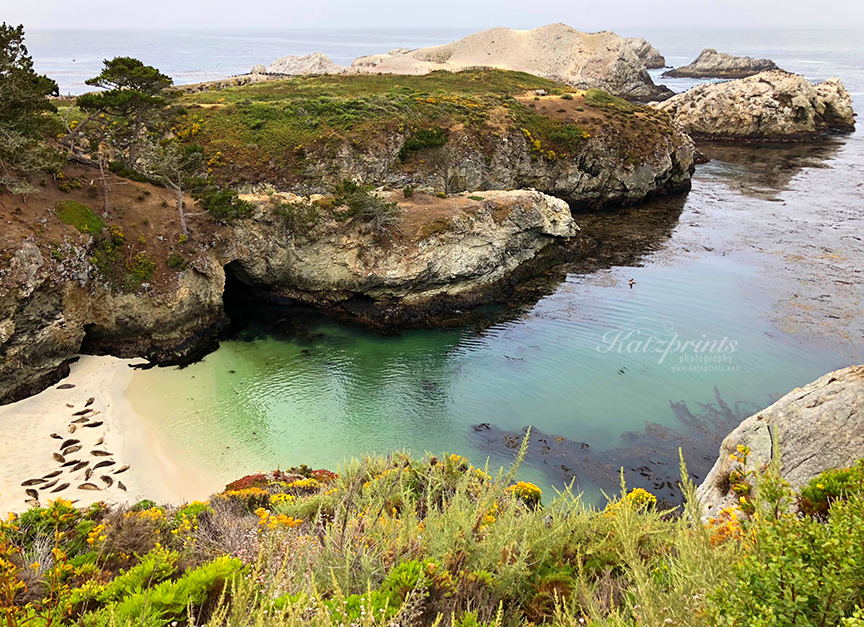
I like to start my Big Sur trip with a visit to Point Lobos State Natural Reserve just south of Carmel-by-the-Sea. This beautiful area of forests, headlands, and coves offers much to see and photograph: mossy trees, bizarre erosion-shaped rock formations, green and turquoise waters, tidepools, and abundant wildlife. The incredible underwater habitats offshore make it a great diving area. And during migration, one can see the spouts of whales passing by in the distance. No wonder then that artist Francis McComa called Point Lobos the “greatest meeting of land and water in the world”.

You can easily spend hours here and never make it to Big Sur (ask me how I know…)!

Harbor seals in beautiful Point Lobos

Tip: Point Lobos tends to get crowded late morning. The best time to go is early in the day before the crowds arrive, later in the afternoon, or during the week. People used to park their cars along both sides of the highway to visit but parking is now more regulated than it used to be. 

Leaving Point Lobos traveling southwards, I often find myself in a state of awe as I reflect on the beauty of the coastline, the engineering efforts that went into building this incredible road and its historic bridges, and the ever-changing weather that can spoil you with sun and mild temperatures in one moment and surprise you with thick fog or strong wind in the next.

Garrapata

A great place to take in the diversity of the landscape and feel the different micro-climates of the jagged Big Sur topography is the little-developed Garrapata State Park. It offers some coastal hikes as well as lesser known trails inland.

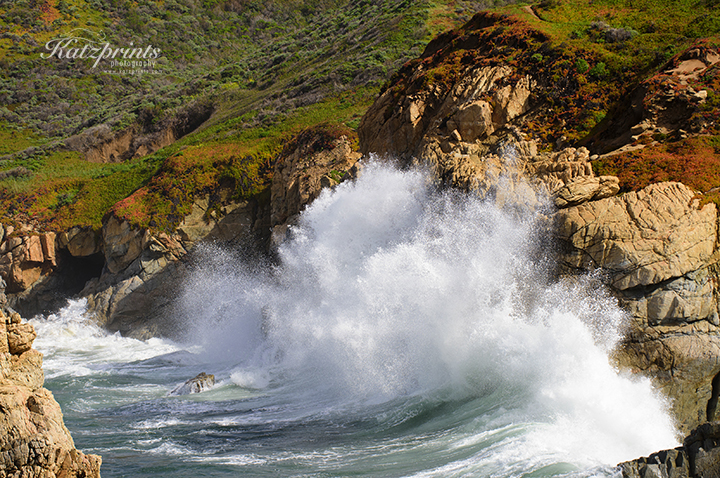
High surf at Garrapata

During a recent visit, we experienced temperature differences of about 25 degrees between the coastal trails and the more protected trails inland. Soberanes Canyon Trail is an interesting and relatively easy walk which follows Soberanes Creek and gives a taste of the biodiversity present in the inland pockets of this area (from heat-loving cacti to the magnificent Sequoia sempervirens, our fog-depending coastal redwood trees). In springtime, the sound of the burbling creek under blooming willow trees is a refreshing companion during the walk. The canyon trail can be connected with Rocky Ridge Trail to form a more strenuous loop through the park.

Soberanes Canyon trail

Tip: From spring to early summer, the coastline is covered with picturesque wildflowers. Later in the year, poison oak becomes a prominent feature along the coastal trails and long pants are advised.

A nice beach to hang out or see Calla lilies in the wild (do not pick) is Garrapata State Beach a bit further down the road.

Rocky Point

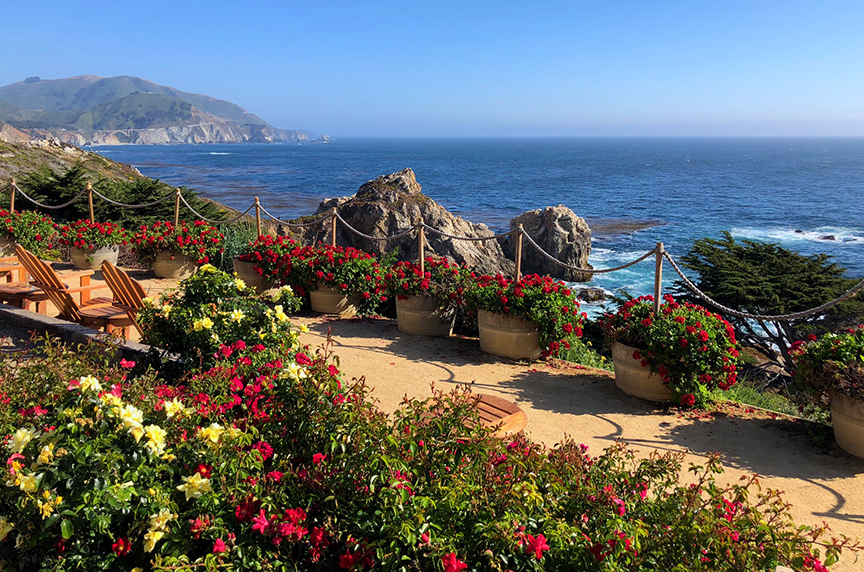
Need a little break from driving? A few miles south of Garrapata is Rocky Point Restaurant. This is one of the great places to enjoy a latte or wine with stunning views.

Rocky Point Restaurant with Bixby Bridge in the distance

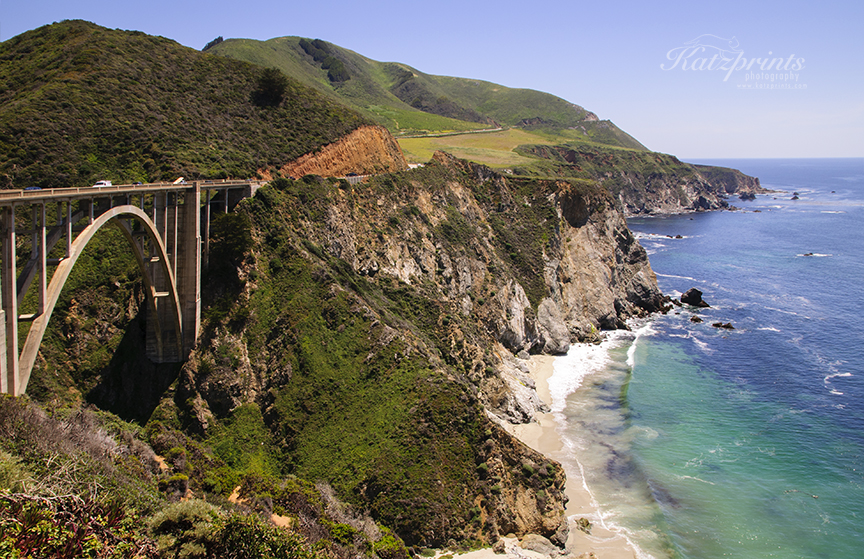
Bixby Bridge

Our next stop traveling south on Highway 1, across Rocky Creek Bridge and past the glimpse of a natural bridge, is the photogenic Bixby Bridge which dates back to 1932.

Natural bridge on the way to Bixby Bridge

A pullout before the bridge lets you get up close and personal with the concrete arch construction. If the parking is is overrun by tourists, which these days happens all too often, continue to drive to Hurricane Point just up the hill for a sweeping view featuring coastline and bridge.

Bixby Bridge from the bridge pullout

Tip: Alternatively, if you have the time, a 4-wheel drive vehicle or a regular vehicle with high clearance, and are in the mood for some adventure, travel up the Old Coast Road, the north end of which is located across from the pullout. This 10-mile rough one-lane dirt road travels inland, bypassing the mouths of the creeks and rivers that are now bridged by the highway. Those who brave it are rewarded with sweeping vistas, rolling hills, and dark redwood groves. Do not attempt this drive in wet conditions!

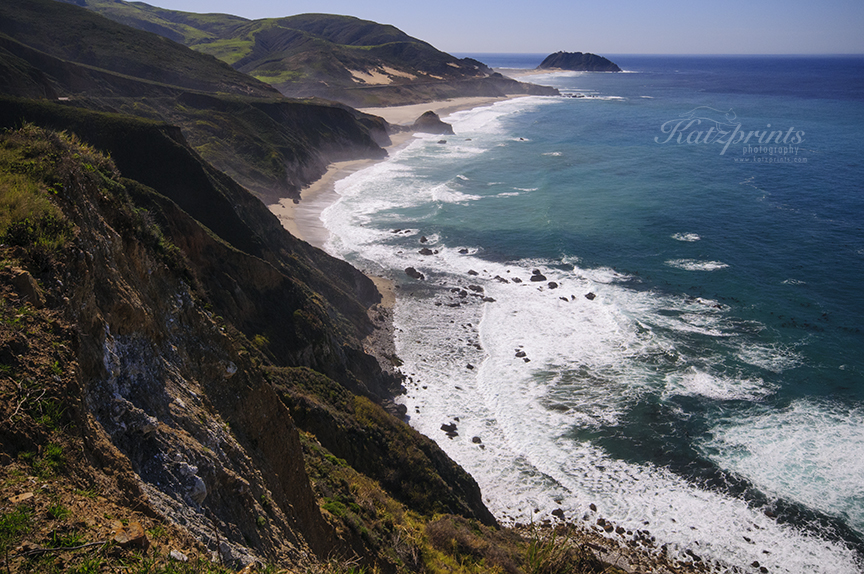
Point Sur

Continuing our drive, the next striking feature is a dramatic volcanic rock offshore on top of which sits the Point Sur Lighthouse, now a historic park.

Big Sur coastline with volcanic rock and lighthouse in the distance

Point Sur is currently inaccessible due to bridge repair but tours are scheduled to resume in fall. More info can be found on the Point Sur website.

Some miles further, the road enters a real outdoor paradise: an area brimming with state parks that offer something for everyone.

We will visit this stretch of the road in my next post.

Historic adobes

Coming from Europe, where building age is often described in hundreds or thousands of years, it took me a while to appreciate the historic buildings of the West Coast … but no worries, by now, I am a fan.

Like so many of us, I first fell in love with the Spanish or California Missions along El Camino Real – I might even write a post about them soon! Recently though, my interest has turned to the less-appreciated building type called adobe.

Luís María Peralta Adobe

The oldest building in San Jose, and its most famous adobe, is the Luís María Peralta Adobe. Manuel González, an Apache Indian, is believed to have built it for his family in 1797, after arriving with the Juan Bautista de Anza expedition. González died in 1804 and four years later the adobe went to Luís María Peralta, giving it the name used today. Peralta was a sergeant in the Spanish Army, commissioner of the Pueblo de San José, and owner of Rancho San Antonio of the East Bay.

Luís María Peralta Adobe with Horno (oven)

González chose the north-west corner of the new Pueblo de San José de Guadalupe to build his home. It still remains in its original location today, but now the Peralta finds itself in the middle of bustling San Pedro Square, where it provides the background for concerts, good meals, and fun drinks with friends.

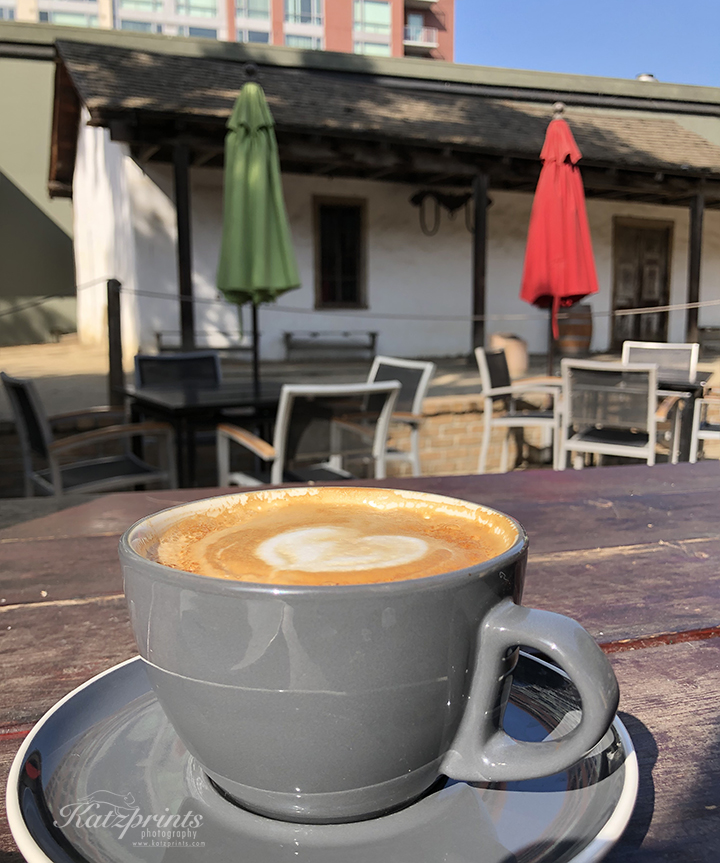
Morning coffee with a view

It is currently open for school program tours only.

Click here to find out more about San Jose’s oldest building.

Roberto Adobe

The only other adobe extant in San Jose is the Roberto Adobe. It is the lesser-known of the pair and only recently opened its doors to the public. The Roberto Adobe was built around 1836 by Native American Roberto Balermino. Roberto grew up with his Ohlone-speaking parents from the Tamien triblet on the Rancheria San Juan Bautista, part of which is now Willow Glen. Both he and his father worked for the padres of Mission Santa Clara and cultivated the land known as Rancho de los Coches (Ranch of the Pigs). In 1836, he petitioned to have the land granted to him. 8 years later, the Mexican governor finally granted him 2,219 acres.

Map downloaded from Sanjoseca.gov

By 1844, Spaniard Antonio Maria Suñol was living on Rancho los Coches with his family. He acquired Rancho los Coches from Roberto in 1847 as part of a debt repayment, and built a brick house adjoining the adobe. It was the first brick house to be completed in Alta California. Roberto’s family was still living in the adobe at that time, and Suñol allowed them to live out their lives there.

Roberto Adobe with Suñol House and Heritage Fig Tree in the background

Today, the Roberto Adobe and the Suñol House are owned by the non-profit California Pioneers of Santa Clara County and house a free museum. Houses and garden can be visited on Saturdays from 12-2pm.

Inside of the Roberto Adobe

Find out more about the Roberto Adobe here.

A taste of adobes farther afield

While only two adobes survived in San Jose, there are others not too far away. Wilder Ranch State Park near Santa Cruz has the Bolcoff Adobe from 1840 (which can only be admired from the outside). The Jose Maria Alviso Adobe is located in Milpitas. It was built by José Maria de Jesus Alviso in 1835 or 1837 (depending on the source) and is the only remaining example of the Monterey Colonial style of architecture in the Santa Clara Valley. The Berryessa Adobe in Santa Clara was built in the late 1840s by Juan Chrisostomo Galindo, one of the first colonists to come to the Santa Clara Valley with the de Anza Expedition, just like Manuel González. According to local lore the building was once a mission jail for unruly Indian field hands. Don Francisco Sanchez, owner of Rancho San Pedro, built the Sanchez Adobe in Pacifica between 1842 and 1846. The Alvarado Adobe is a museum open to the public. It is the former home of Juan Alvarado, the governor of Mexican Alta California and is located in San Pablo. The Petaluma Adobe served as the center of General Mariano Guadalupe Vallejo’s 66,000-acre (100 square miles) working ranch from 1836 to 1846. Made from adobe brick and redwood, its design is typical of Hispanic Architecture. The Francisco Solano Alviso Adobe is located in Alameda County near Dublin and was erected in 1844-46 by Francisco Solano Alviso. It was the first adobe house to be built in the Pleasanton Valley.

Bolcoff Adobe, Wilder Ranch State Park

Of course, there are great examples of adobe architecture in San Juan Bautista and Monterey as well. Since they are part of greater historic plazas, we will talk about them in another post.

Have you visited one of our adobes? Which one is your favorite?

Eagle eye

For as long as I can remember, my parents and friends have called me “eagle eye”. When some tiny item dropped into the grass or a car key went missing, I was called to the rescue. When a text had to be proofread before publishing, I was the go-to person. After decades of computer work and its associated sight deterioration, my success rate has admittedly gone down … but that’s OK because it got replaced by something much better. Real eagle eyes!

Bald eagles

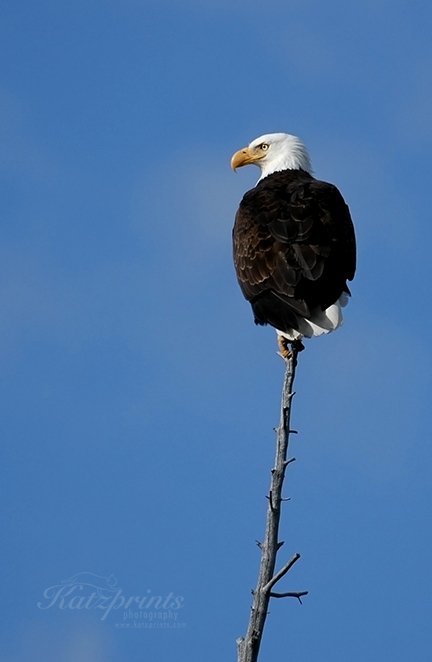
My very first bald eagle sighting! Ahhh, I can remember it so well. I was visiting Yellowstone National Park with my BF and the beautiful bird sat on top of a dead tree next to the Lake Yellowstone Hotel. Being inseparable from my camera, I took a photo.

My first ever bald eagle photo, Yellowstone National Park (2007)

And even though my shot was not very good, I was extremely happy to have captured this iconic bird in the wild. A few more encounters followed over the years, one during a drive on the Olympic Peninsula, another during a leaf-peeping trip to Convict Lake in the Eastern Sierra, and one more at the shores of Lake Tahoe.

Special, fleeting moments all, far away from home.

Until 2017.

Historical feather facts

Before we visit the present, let’s first have a quick walk down memory lane. America adopted the bald eagle as its national symbol in 1782, a time when the number of nesting birds was estimated at about 100,000. By 1963, the number of nesting pairs had fallen under 500 rendering the bird close to extinction. What happened in those 180 years?

Three major things:
-Considerable loss of habitat
-Hunting (eagles were shot as perceived livestock killers; unfortunately, this is still happening today)
-DDT

Shortly after World War II, DDT was hailed as a new pesticide to control mosquitoes and other insects. I sometimes wonder if it actually was in the rather efficient mosquito spray my parents used when I was a kid… And as so often happens with new and shiny (chemical) toys, it takes time to figure out their side-effects. In the case of DDT, it silently worked itself through the food chain and ended up in the eagles’ diet (among other places), slowly poisoning the birds and interfering with their ability to produce eggshells thick enough to remain intact during incubation. With hardly any offspring to account for, numbers plummeted.

A combination of key actions – the ban of DDT by the EPA, the enactment of the Endangered Species Act, the Migratory Bird Treaty Act, and the Bald and Golden Eagle Protection Act, as well as the protection of nesting sites and successful breeding programs – brought the eagles back from the brink of extinction in one of the best wildlife conservation success stories of our times. (We’ll talk about some of the other stories in future posts.)

Bay Area eagles

As part of the eagle rebound, we now have bald eagles in Silicon Valley. I know! It’s crazy, isn’t it!? I talked to a ranger last year and he said there might be as many as 20 individuals calling the greater Bay Area their home. I can only take his word for that but what I do know is this: I have been spending uncountable hours with one pair over the last years and it’s been an inspiring and at times dramatic experience!

Now, we do have a code of conduct amongst birders and wildlife photographers not to disclose nesting sites of rare or protected species. However, the eagle pair I will tell you about lives a rather public life. It’s been written about in the print media and has made appearances on local news stations. Hence, I feel comfortable writing this post.

The pair built a nest in Milpitas of all places (actually, thinking about it, not too surprising… after all, who can afford real estate anywhere along the Peninsula these days?!) and had their first chick in 2017. The young parents did well and we saw the chick grow from a little grey fuzzball to a beautiful brown-colored juvenile.

No one knew if the eagle presence was going to be a one-off, so imagine the delight when they came back for more!

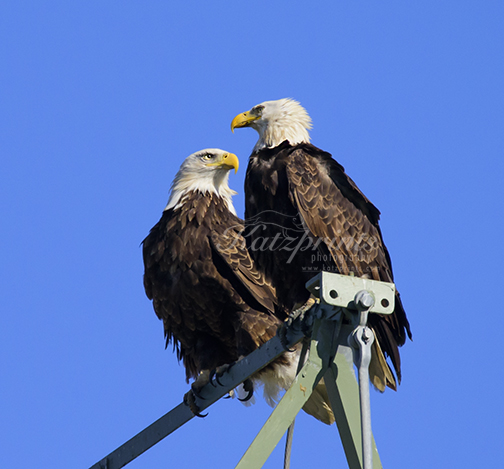
Bald eagle pair (2018)

In 2018, the pair had two chicks, and while that could be considered a success, it meant much more work and drama. On June 18 of that year, one of the eaglets fell out of the nest. Of course, those of us who have siblings think she probably got pushed, but either way, it was not a good situation. Just think cars, dogs, feral cats, raccoons…

The California Department of Fish & Game and the Milpitas Fire Department came with a cherry picker lift to put the eagle back into the nest after a medical exam. But you know how you pick a flat screen TV in a store and think it’ll be great in your house just to realize later it is actually huge?! Well, the crane and the redwood tree were not a match made in heaven. The rescuers reached nowhere near the nest. All they could do was put the eagle on a lower branch. (OK, kidding aside, it truly is a team effort providing eagles in this urban environment of ours with a fighting chance, and California Fish & Game, Milpitas PD, the City of Milpitas, the Vice Mayor, the Fire Dept, the Wildlife Center of Silicon Valley, have all been great partners! But I digress.)

So Fish & Game put the eagle on a branch. Or should I say they tried? Our eaglet could not hold on, fell right off, and hurt itself further. The good people of the Lindsey Wildlife Rehabilitation Hospital in Walnut Creek tended to its bruises. They also treated it, no, wait, HER (!) for lead exposure, a possible reason for some of her problems. After a few days, via the California Foundation for Birds of Prey, she – by now we called her “Lucky” – was transferred to the Ventana Wildlife Society, the wonderful organization in charge of reintroducing California Condors into the wild. They continued her care and provided a soft release at their condor recovery release site. I found out from Joe Burnett, Senior Biologist at VWS, that she was hanging out with some impromptu role models, California condors, for a few days but we don’t know where her wings took her afterwards. Hopefully, she is now freely roaming the coastal hills or taking dips in Lake Nacimiento. Meanwhile, eaglet #2 couldn’t care less about all the commotion and grew up nicely, using a sports field for flying and landing practice.

Practice makes perfect. Juvenile eagle (2018)

This year, the eagle saga continued with a twist. Eagles mate for life but the 2019 dad didn’t look like our prior, disheveled dad. No. He looked good! Did he visit the spa to regrow all the broken tail feathers when the kids were finally out of the house? Unfortunately, it is more likely that he died and momma eagle accepted a new partner. They fortified the nest and started a new family with two chicks again. On a constant stream of fish, occasionally enhanced by squirrels or ducklings, the two little bald eagles grew quickly. By the end of June, both were testing their wings and hopping around in the nest.

A few days before the 4th of July, the bigger eaglet fledged. He probably thought it was a great idea. That is, until he realized he could not get back into the nest. So yet again, drama ensued. The eaglet spent two days on a small tree, calling for food while the parents tried to coax him back to the nest. On July 5, he landed in the school yard prompting Milpitas police to put up police tape in the hope of keeping people and their dogs away from the grounded bird. Problem is, police tape might keep people out but not necessarily eagles in. And so in the afternoon of that day, he limboed right under that tape and into the streets. Normally, it would not occur to me to walk into the street and direct traffic, but desperate times call for desperate measures! And so I stopped a few cars and made sure that our eaglet safely crossed the street. On a crosswalk no less!

Juvenile eagle about to cross the street (2019)

Later that day, he tried to fly again and crash landed in an orange tree. From there he managed to hop onto a roof. Where he got attacked by mockingbirds. And got stuck in one of those whirly roof fans. Maybe that’s just nature. Or maybe karma was coming down hard on him for not sharing his food with his younger sibling. Either way, finally, finally, after five days without food, the eaglet made it back into the nest. Up high in the redwood tree, he performed the eagle rendition of The Very Hungry Caterpillar. First, he ate a fish, but he was still hungry. Then he ate a duckling. Then a seagull. You get the idea!

Who knows what the next days and weeks will bring for our bald eagle family, but this much is sure: growing up as an eagle in an urban environment is not easy!! 

************************************

I am heartbroken.
News about the younger eaglet, 07/13, PM:

Community,
It is with great sadness that I share that our eaglet, little Jr., was found dead this afternoon. I have been at the scene working with our Police Department, the Department of Fish and Wildlife Law Enforcement, and our community to ensure there is a full investigation to find out the cause of death. Please, if you heard or saw any activity, please report it to Cal Tip at 1-888-334-2258.

We will continue to work together to find out what happened to our beloved feathered community member. We hope to have more information in the next upcoming days. If you have any questions, please feel free in contacting me.

In community,
Karina Dominguez
Vice Mayor, City of Milpitas

The younger eaglet stretching its wings on 07/01/2019. RIP.

************************************

If you were inspired by this story, consider donating to one of the many groups that take care of injured wildlife. I mentioned several close to my heart in this post but there are many more. Also, even though it might be tempting, please do not fly drones near nests (it disturbs the birds and happens to be illegal), make sure to keep your pets away from birds on the ground, and keep your distance from wildlife. 100 yards is always a good recommendation.

The Bard in the park

Summer is a great time to enjoy the outdoors: from story-telling around bonfires on your favorite beach to camping under towering redwoods. But summer is also the time when the art community comes out in full force. From now till fall, art shows happen almost every weekend in main streets around the Bay Area, and many cities offer free concerts in parks and school grounds. But today, we’ll look at a quieter, less commonly known art treasure: Shakespeare in the Park.

Free performances

The first time I came across free Shakespeare was a few decades ago in Golden Gate Park. A crowd had gathered in one of the big meadows and I thought to myself: “This looks gemütlich, let’s see what might be going on.” My friendly neighbors offered me a spot on their blanket and a glass of wine, and so it began. Little did I know then that Shakespeare in the Park is a tradition, and one not limited to San Francisco.

Below are some places where you can see Shakespeare performed for free. Of course, there are many, many more places all around the Bay Area, where you can enjoy his works on the beach or in the forest with a ticket (and a glass?) in hand!

Silicon Valley Shakespeare

Shakespeare in Willow Glen’s Bramhall Park, San Jose

Bramhall Park, Willow Glen

Silicon Valley Shakespeare chose A Midsummer Night’s Dream as their free 2019 play (the photo is from a prior season).

San Francisco Shakespeare Festival

Amador Valley Community Park, Pleasanton
Memorial Park, Cupertino (enjoy English poetry mixed with the sound of local ducks 🙂
Grounds of Sequoia High School, Redwood City
Main Post Parade Ground Lawn, Presidio, San Francisco
Jerry Garcia Amphitheater, McLaren Park, San Francisco

The San Francisco Shakespeare Festival brings you As You Like It this year. They play in different parks from June to September.

Vallejo Shakespeare in the Park

Hanns Park Amphitheater, Vallejo
Rithet Park, Crockett
Susanan Park, Martinez
Peralta Hacienda Historical Park, Oakland

Vallejo Shakespeare in the Park will perform Henry V from July to August at several East Bay locations.

Tips

Like many other free programs, free Shakespeare depends on donations. If your wallet allows for it, please drop a few bills in the hat at the end of the evening. Some of the companies also offer merchandise like shirts and sweaters.

This is Northern California and it tends to get cold after sundown. Plan accordingly (or buy that sweater!)

Food can be purchased at booths or food trucks at some of the festivals, but do not count on it. Bring your own picnic. That’s half of the fun anyways!

Blankets and low chairs are always allowed. Do check the performance websites for rules on taller chairs though.

Here are some more tips from the SF Shakespeare Festival site:
http://www.sfshakes.org/programs/free-shakespeare-in-the-park/tips-for-attending-free-shakes

Now go and grab that blanket, because “nothing will come of nothing!”